How To Perform A Clean Ubuntu 20.04 Or 18.04 With Unity Installation Using The Mini ISO
Ubuntu 18.04 is the first Ubuntu long-term release to use Gnome as the default desktop instead of Unity. While Unity can still be installed from the repositories, you may not want the whole Gnome desktop installed alongside Unity. [[Edit]] This article was updated to include instructions for creating a clean Ubuntu 20.04 with Unity installation.
This article is for those who prefer to install Ubuntu 20.04 / 18.04 with Unity instead of Gnome (Shell). It explains how to perform an Ubuntu 20.04 / 18.04 LTS installation which uses Unity by default with all its dependencies, but without the whole Gnome desktop packages that are available in a standard / default (with Gnome desktop) Ubuntu 20.04 or 18.04 installation.
For this we'll use the Ubuntu mini.iso (Netboot image), perform a minimal installation without any desktop environment, then install the Ubuntu Unity desktop with its dependencies.
Using these instructions, you'll get the complete Unity desktop environment with its default applications, including LibreOffice, Thunderbird, Firefox, Nautilus (Files), the Ubuntu Software app, the default Unity indicators, the LightDM login and lock screen, and so on. You won't need to remove any packages, switch between GDM and LightDM or anything like that.
What you should know before using this to install Ubuntu 18.04 with Unity:
- Using the Ubuntu mini.iso requires a working Internet connection from the installer, because the minimal ISO image downloads packages from online archives at installation time, instead of installing them from the ISO itself. You'll also need a working Internet connection to install Unity from the command line the first time you boot the newly installed Ubuntu 20.04 / 18.04 minimal.
- The Ubuntu mini.iso installer is text-based. If you haven't used such installers before do not worry, it's very easy to use.
- The Ubuntu Netboot image (mini.iso) doesn't support UEFI by default. There's a simple work-around if you want to boot in UEFI mode though: make a bootable USB from the mini.ISO, then copy the EFI folder from the full Ubuntu 20.04 / 18.04 ISO (you need to mount it to be able to copy the EFI folder) to the USB stick. I did not try this.
How to perform a clean Ubuntu 20.04 or 18.04 installation with Unity instead of the GNOME desktop, using the Netboot installer (mini.iso)
1. Download the Ubuntu Netboot image.
- Ubuntu 20.04: Download the mini.iso file for Ubuntu 20.04 from this link
- Ubuntu 18.04: You need to download the mini.iso file for the architecture you want to use from here (if you don't know what's that, you'll want the mini.iso file from the "amd64" link/folder)
2. Create a bootable media from the mini.iso image file.
You can use Etcher, a GUI tool to create a bootable USB from Linux, Windows or Mac. Or you can use dd or bootiso to create a bootable USB drive from the command line.
3. Minimal Ubuntu 20.04 / 18.04 install using the mini.iso image.
Start the installation from the bootable USB (choose Install from the boot screen) and follow the on-screen instructions:
Use the
TAB key to navigate through the text-based installer and the Space key if you need to select / check boxes.When you get to the
Software selection section, do not select any software to install from the list. Instead, press the TAB key and select Continue:Why do this you may ask. That's because you only need the Ubuntu 18.04 base. For some reason Unity is not listed in the software selection on this screen (unlike other desktops, like MATE minimal or MATE Desktop, Ubuntu Studio desktop, Kubuntu full, and so on) so we'll have to install it later.
4. Reboot, remove the installation media, boot to the newly installed Ubuntu 18.04 minimal and login from the command line.
After the installation is completed, reboot the system, remove the installation media, and you should be presented with a TTY (terminal), like in the screenshot above, which asks you to login. Enter the username and, when prompted, the password you entered during the installation process.
5. Install the complete Unity desktop.
After logging in to the TTY in the previous step, it's now time to install the complete Ubuntu Unity desktop. To do this, type the following command:
sudo apt install ubuntu-unity-desktopOn Ubuntu 20.04, you'll be presented with a screen asking you to choose between lightdm and gdm3 for the default display manager:
When you get to that screen, press
TAB to select lightdm, then press the Enter key to proceed.6. Reboot and login to your Unity desktop.
To reboot the computer, type this command:
sudo rebootAfter the computer reboots you should no longer see the TTY and instead, the LightDM login screen should show up, allowing you to login to the Ubuntu Unity session:
Unity loaded for the first time presenting the keyboard shortcuts overlay on top of Ubuntu 18.04 LTS:
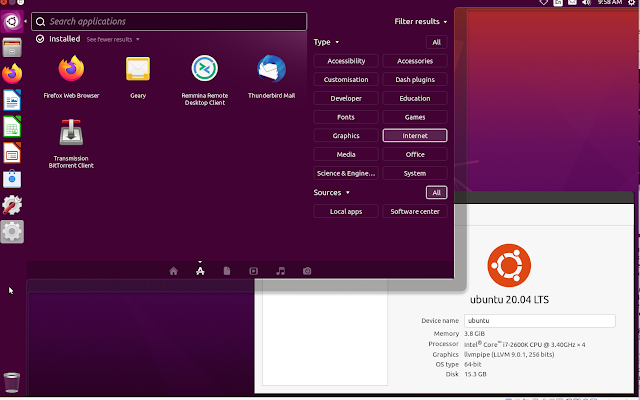
Unity installed on top of Ubuntu 20.04 LTS (Focal Fossa):
Extra tip for Ubuntu 20.04 with Unity users: You can get Unity to use the new Ubuntu Yaru GTK and icon theme.
To do this, install the
yaru-theme-unity package which adds Yaru theme support to Unity, as well as the Yaru GTK theme:sudo apt install yaru-theme-unity yaru-theme-gtkNow change the GTK theme to Yaru using:
gsettings set org.gnome.desktop.interface gtk-theme YaruOr if you want to set it to Yaru-dark (the dark variant of Yaru):
gsettings set org.gnome.desktop.interface gtk-theme Yaru-darkIn case you want to go back to the default Unity Ambiance theme, use:
gsettings set org.gnome.desktop.interface gtk-theme AmbianceRelated (while some things are Gnome Shell-specific, many apply to other desktop environments as well, including Unity):


