How To Customize Ubuntu Or Linux Mint Live ISO With Cubic
Cubic, or Custom Ubuntu ISO Creator, is a GUI that can be used to create a custom bootable Ubuntu Live CD (ISO). While the application is targeted at Ubuntu, it also works on Linux Mint / is able to create a custom Linux Mint ISO. This article includes step by step instructions for how to create your custom Ubuntu or Linux Mint ISO using Cubic.
The application comes with an integrated command line chroot environment, and it unpacks and packs the ISO for you, while also populating some "intelligent defaults to simplify the customization process", is mentioned on its web page.
While Cubic uses a graphical user interface, all the actual Ubuntu or Linux Mint ISO customizations must be performed from the command line (while it's possible to run GUI applications from a Chroot, I couldn't get this to work with Cubic's Chroot). So you'll need to be familiar with at least installing software from the command line to make your own custom Ubuntu or Linux Mint ISO. This obviously depends on what tweaks and modifications you want to include in your customized ISO.
As far as UEFI support goes, Cubic uses files from your host machine to create the EFI ISO. Therefore, you need to create the custom Ubuntu or Linux Mint ISO while using a host system that uses EFI to be able to create an EFI-enabled custom ISO. See Launchpad for details.
I tried Cubic on my Ubuntu 18.04 system to create both a custom Ubuntu 18.04.1 and a Linux Mint 19 ISO and the software worked without any issues.
Install Cubic
Add the Cubic PPA and install the software on your Ubuntu or Linux Mint system using these commands:
To use Cubic to create a custom Ubuntu or Linux Mint ISO, follow these steps.
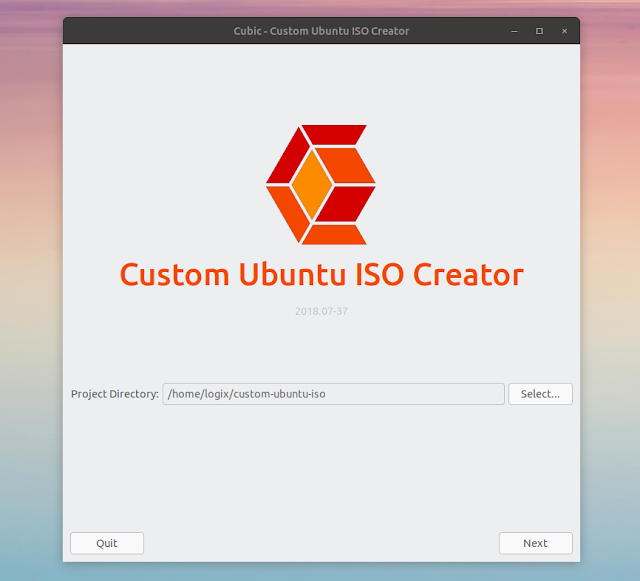
1. Launch Cubic from your desktop menu and select a directory for your new project.
Simply create a new empty folder and select it from Cubic. This is the directory where Cubic will extract the ISO and also where it will save the final, customized Ubuntu / Linux Mint Live ISO file.
Once you're done, click Next.
2. Select the ISO you want to customize.
This can be Ubuntu, Linux Mint (including Ubuntu 20.04 or Linux Mint 19.*), any Ubuntu or Mint flavor, and probably other Ubuntu-based Linux distributions.
I only tried Cubic with Ubuntu or Linux Mint, so I'm not entirely sure it can create custom ISOs for other Ubuntu-based Linux distributions, but at least in theory I don't see why it wouldn't work.
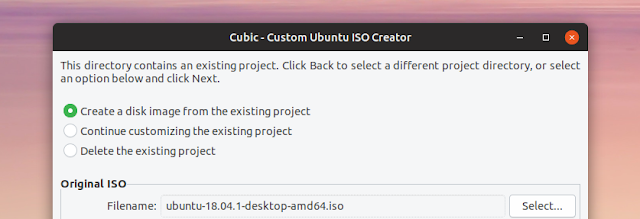
If you're selecting a folder where you've already unpacked an ISO using Cubic, the application will ask you if you want to create a disk image from the existing project, continue customizing the existing project, or delete it:
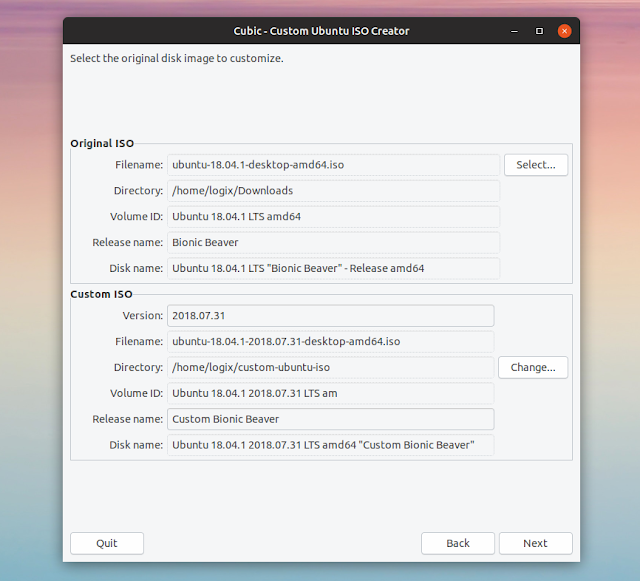
After loading the ISO, Cubic will let you change some custom ISO settings, like entering a release name, disk name, volume ID, output directory and filename, and so on. Change these as you wish.
Once you're done, click Next.
Cubic will now extract the compressed Linux file system from the ISO and copy some files from the original disk image.
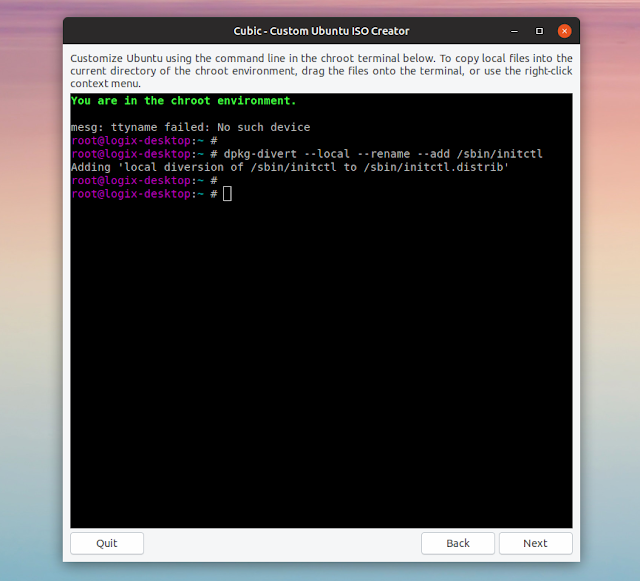
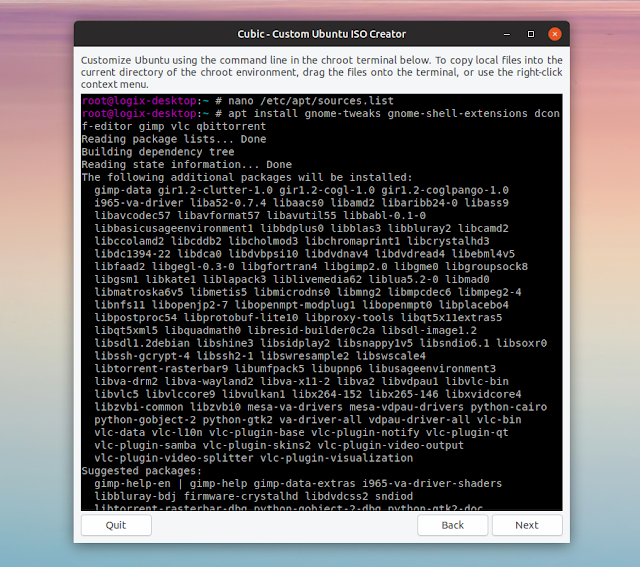
3. On the next screen, Cubic displays an embedded terminal window with a chroot environment. This is where you can customize the ISO.
From this command line chroot, customize the ISO to suit your needs. Install extra packages (applications, libraries, kernel images, etc.), remove any installed packages, add or remove PPAs or other third-party repositories, download external packages and install them on the custom Linux Mint or Ubuntu ISO image, change configuration files and anything else you'd like.
What you should know:
Ubuntu only: By default, Ubuntu enables only the main and restricted repositories on the Live CD ISO. As a result, you won't be able to install packages found in the universe and multiverse repository for your custom Ubuntu ISO, or at least that was the case for me, using Ubuntu 18.04 to create a custom Ubuntu 18.04.1 ISO. So to be able to install some packages, you'll also need to enable the universe and multiverse repositories. Here is how to do that.
In the Cubic chroot, type:
After each line (there should only be 3 lines), add a space and then add this:
To save the changes made to the
Now run
This tweak is not needed for Linux Mint, because it already has all the default repositories enabled.
Once you're done making your changes, click the Next button.
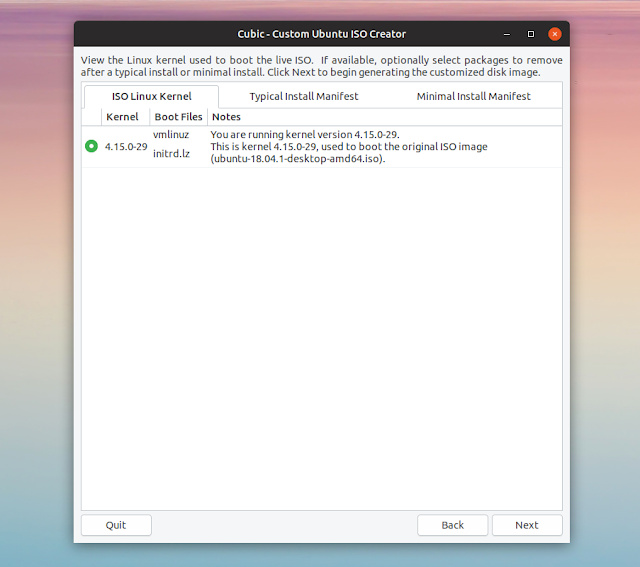
4. Choose which Linux kernel to use and packages from a typical install to remove.
On the next screen you can choose which Linux kernel to use (only one in my case - screenshot above), in case you've installed some extra kernel packages on the customized ISO.
You can also select packages to remove after a typical install or minimal install (the latter is only available for Ubuntu; there's no minimal ISO for Linux Mint, etc.):
For most cases it's recommended leaving these options to their default values.
Click Next and the ISO generation process should begin. Click Finish after it's done
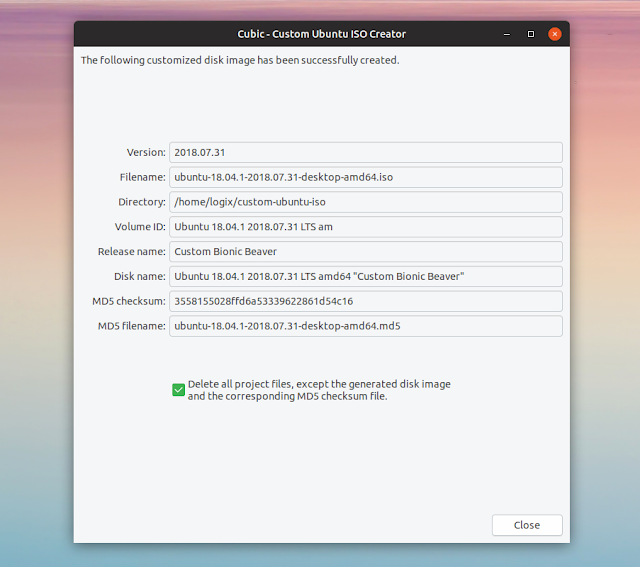
5. And... it's done!
In the final step Cubic lists the path where it saved the generated custom ISO file (by default it's saved in the folder you've selected in step 1), the release and disk name, and so on.
You'll also find an option to delete all project files except for the generated ISO file and its MD5 checksum file.
The custom Ubuntu or Linux Mint Live ISO should now be ready. You can burn a copy of the ISO image to a CD or DVD, or use a bootable USB creation tool (like Ubuntu's Startup Disk Creator or bootiso) to make a bootable USB from your new custom ISO.
In case you get an error similar to the one below when trying to boot an USB for which you've used a custom ISO created with Cubic, on an EFI system (fix credits):
You'll need to install
And then use this command:
Replacing
You might also want to read:
The application comes with an integrated command line chroot environment, and it unpacks and packs the ISO for you, while also populating some "intelligent defaults to simplify the customization process", is mentioned on its web page.
While Cubic uses a graphical user interface, all the actual Ubuntu or Linux Mint ISO customizations must be performed from the command line (while it's possible to run GUI applications from a Chroot, I couldn't get this to work with Cubic's Chroot). So you'll need to be familiar with at least installing software from the command line to make your own custom Ubuntu or Linux Mint ISO. This obviously depends on what tweaks and modifications you want to include in your customized ISO.
As far as UEFI support goes, Cubic uses files from your host machine to create the EFI ISO. Therefore, you need to create the custom Ubuntu or Linux Mint ISO while using a host system that uses EFI to be able to create an EFI-enabled custom ISO. See Launchpad for details.
I tried Cubic on my Ubuntu 18.04 system to create both a custom Ubuntu 18.04.1 and a Linux Mint 19 ISO and the software worked without any issues.
Installing and using Cubic to create a custom Linux Mint or Ubuntu ISO
Install Cubic
Add the Cubic PPA and install the software on your Ubuntu or Linux Mint system using these commands:
sudo add-apt-repository ppa:cubic-wizard/release
sudo apt update
sudo apt install cubic
To use Cubic to create a custom Ubuntu or Linux Mint ISO, follow these steps.
1. Launch Cubic from your desktop menu and select a directory for your new project.
Simply create a new empty folder and select it from Cubic. This is the directory where Cubic will extract the ISO and also where it will save the final, customized Ubuntu / Linux Mint Live ISO file.
Once you're done, click Next.
2. Select the ISO you want to customize.
This can be Ubuntu, Linux Mint (including Ubuntu 20.04 or Linux Mint 19.*), any Ubuntu or Mint flavor, and probably other Ubuntu-based Linux distributions.
I only tried Cubic with Ubuntu or Linux Mint, so I'm not entirely sure it can create custom ISOs for other Ubuntu-based Linux distributions, but at least in theory I don't see why it wouldn't work.
If you're selecting a folder where you've already unpacked an ISO using Cubic, the application will ask you if you want to create a disk image from the existing project, continue customizing the existing project, or delete it:
After loading the ISO, Cubic will let you change some custom ISO settings, like entering a release name, disk name, volume ID, output directory and filename, and so on. Change these as you wish.
Once you're done, click Next.
Cubic will now extract the compressed Linux file system from the ISO and copy some files from the original disk image.
3. On the next screen, Cubic displays an embedded terminal window with a chroot environment. This is where you can customize the ISO.
From this command line chroot, customize the ISO to suit your needs. Install extra packages (applications, libraries, kernel images, etc.), remove any installed packages, add or remove PPAs or other third-party repositories, download external packages and install them on the custom Linux Mint or Ubuntu ISO image, change configuration files and anything else you'd like.
What you should know:
- You can copy files from the host computer to the custom ISO by dragging the files and dropping them on top of the Cubic (chroot) window.
- For editing files you need to use a command line text editor. You can use
nano, which is installed by default, or install some other command line text editor. To save a file using Nano text editor, useCtrl + O, then press theEnterkey. You can exit Nano by pressingCtrl + X. - There's no need to use
sudo, you're already logged in as root in the chroot environment
Ubuntu only: By default, Ubuntu enables only the main and restricted repositories on the Live CD ISO. As a result, you won't be able to install packages found in the universe and multiverse repository for your custom Ubuntu ISO, or at least that was the case for me, using Ubuntu 18.04 to create a custom Ubuntu 18.04.1 ISO. So to be able to install some packages, you'll also need to enable the universe and multiverse repositories. Here is how to do that.
In the Cubic chroot, type:
nano /etc/apt/sources.listAfter each line (there should only be 3 lines), add a space and then add this:
universe multiverse, like in this screenshot:To save the changes made to the
sources.list file, press Ctrl + O and Enter, and then Ctrl + X to exit Nano command line text editor.Now run
apt update and you should be able to install software that's available in the Ubuntu universe and multiverse repositories:This tweak is not needed for Linux Mint, because it already has all the default repositories enabled.
Once you're done making your changes, click the Next button.
4. Choose which Linux kernel to use and packages from a typical install to remove.
On the next screen you can choose which Linux kernel to use (only one in my case - screenshot above), in case you've installed some extra kernel packages on the customized ISO.
You can also select packages to remove after a typical install or minimal install (the latter is only available for Ubuntu; there's no minimal ISO for Linux Mint, etc.):
For most cases it's recommended leaving these options to their default values.
Click Next and the ISO generation process should begin. Click Finish after it's done
5. And... it's done!
In the final step Cubic lists the path where it saved the generated custom ISO file (by default it's saved in the folder you've selected in step 1), the release and disk name, and so on.
You'll also find an option to delete all project files except for the generated ISO file and its MD5 checksum file.
The custom Ubuntu or Linux Mint Live ISO should now be ready. You can burn a copy of the ISO image to a CD or DVD, or use a bootable USB creation tool (like Ubuntu's Startup Disk Creator or bootiso) to make a bootable USB from your new custom ISO.
In case you get an error similar to the one below when trying to boot an USB for which you've used a custom ISO created with Cubic, on an EFI system (fix credits):
isohybrid: Warning: more than 1024 cylinders: 2215 isohybrid: Not all BIOSes will be able to boot this deviceYou'll need to install
syslinux-utils (we'll need the isohybrid command from this package):sudo apt install syslinux-utilsAnd then use this command:
sudo isohybrid /path/to/custom_iso.isoReplacing
/path/to/custom_iso.iso with the path to the ISO generated by Cubic. You can now create a bootable USB from this ISO and it should work on EFI systems. You still need to use a host system that uses EFI to be able to create a custom Ubuntu or Linux Mint ISO with EFI support!You might also want to read:
- bootiso: Easy ISO To Bootable USB Drive From The Command Line
- Groot Simplifies Entering Chroot On Any Linux Distribution
